Card Creation Process
To begin Creating your first card, please click the "Create New ID" button on the home page.
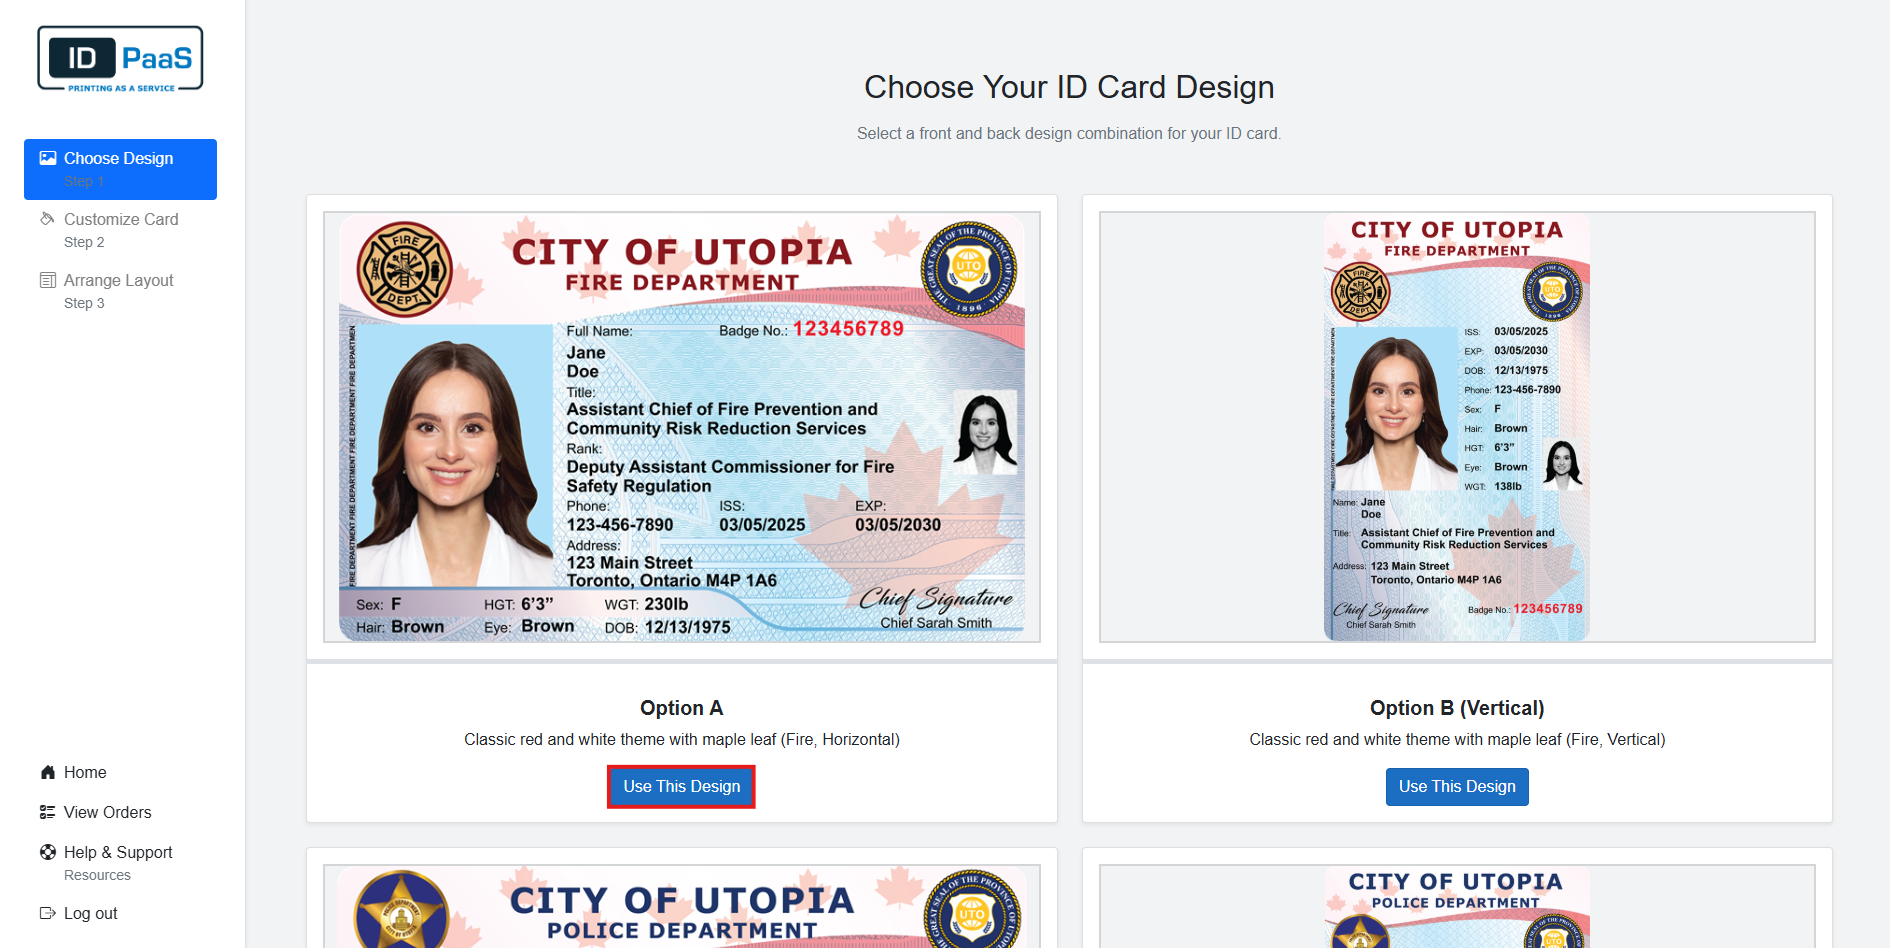
Choose Design

After clicking the button, you will be brought to the first page of the card creation Process, Choose Design.
The first thing that you will see is that the left navigation menu was updated. As you go through the ID creation process the Tabs on the nav will become clickable allowing you to go to a previous step to modify your previous changes.
The center of the page contains multiple Card templates for you to chose. Hovering over any of the templates will flip the card and show the back of the card. Once you have decided on which design you want, please click on the "Use this Design" button to select the card.
At any point during the ID creation process, you can return to the Choose Design page by selecting Choose Design in the left navigation and select a new ID Design. Doing so will Discard all of your current changes.
Customize Card
After you select a card, you will be brough to the Customize Card Page. Here you will be able to modify certain text fields and images on the card.
The fields on the Front and Back of the Card Designs Vary, but you will be able to upload Images (PNGs) and Text on the card.
As you customize the card, you will have a live rendering of the card appear on the right of the screen. To start customizing the back of the card, please select the Back button to display the back of the card. To switch back to the front, please select the front button.
These fields on the front are movable, so if they do overlap on this page do not worry. You can Move the text or Move/Resize the Images if needed on the Arrange Layout Page.
Front
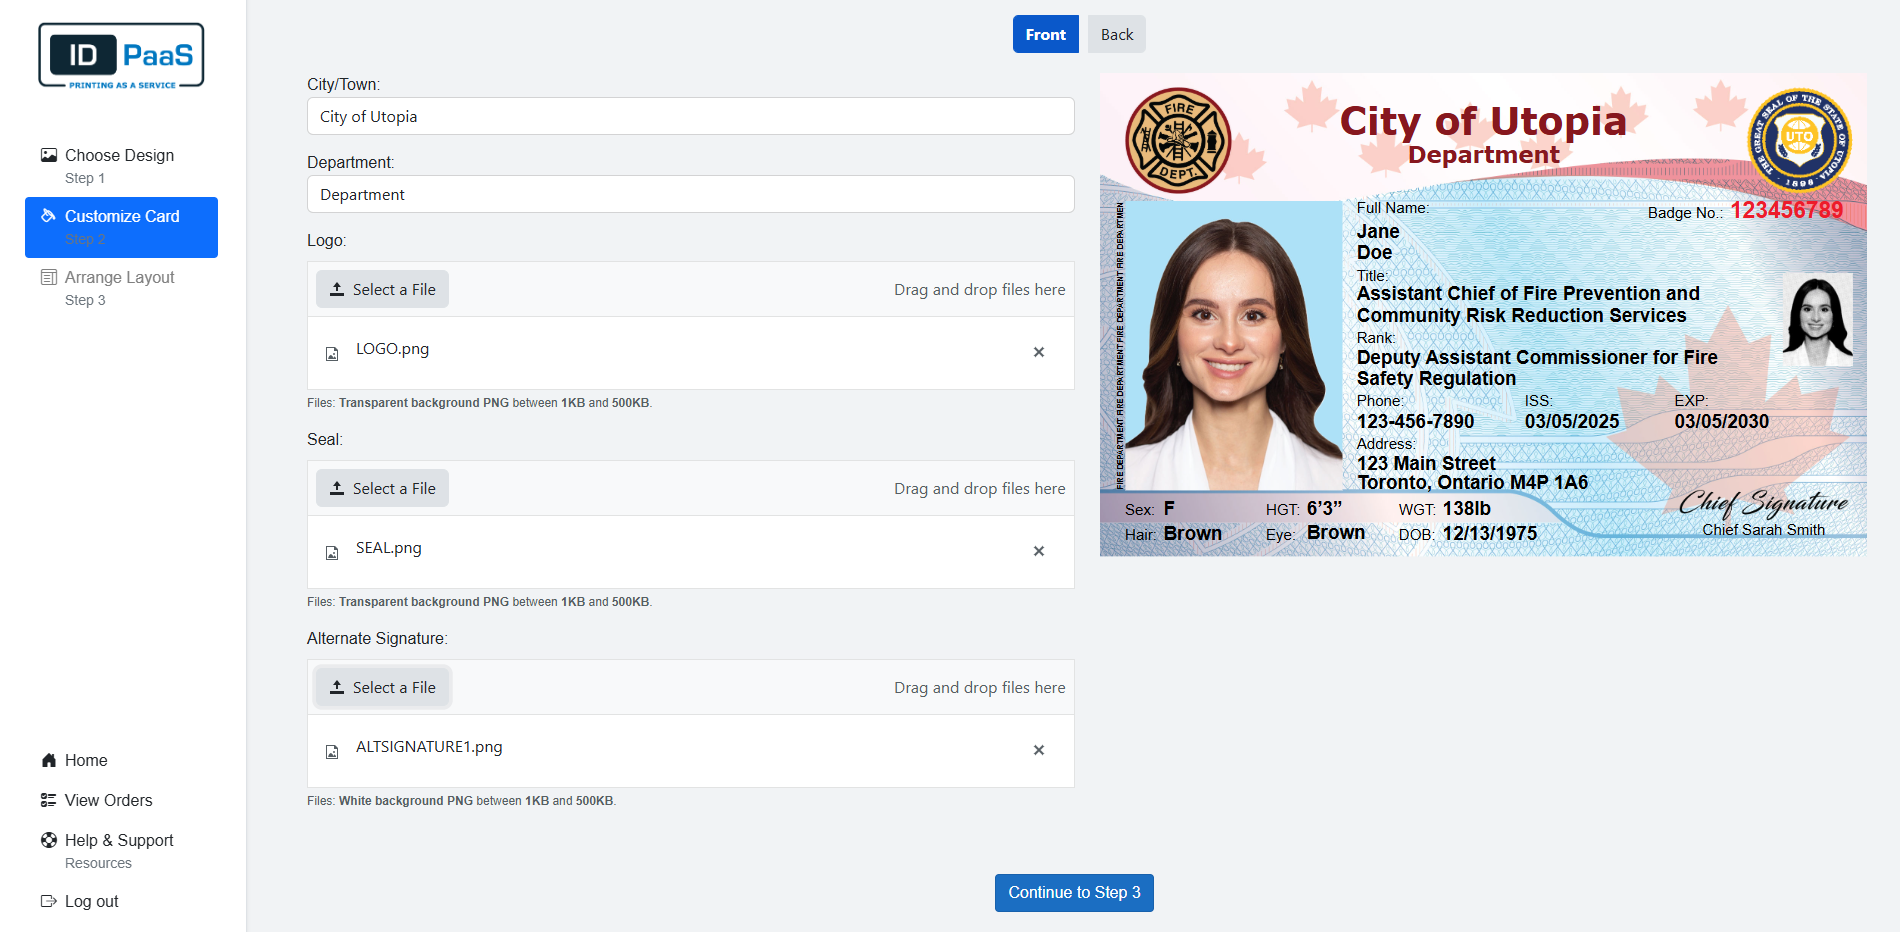
Back
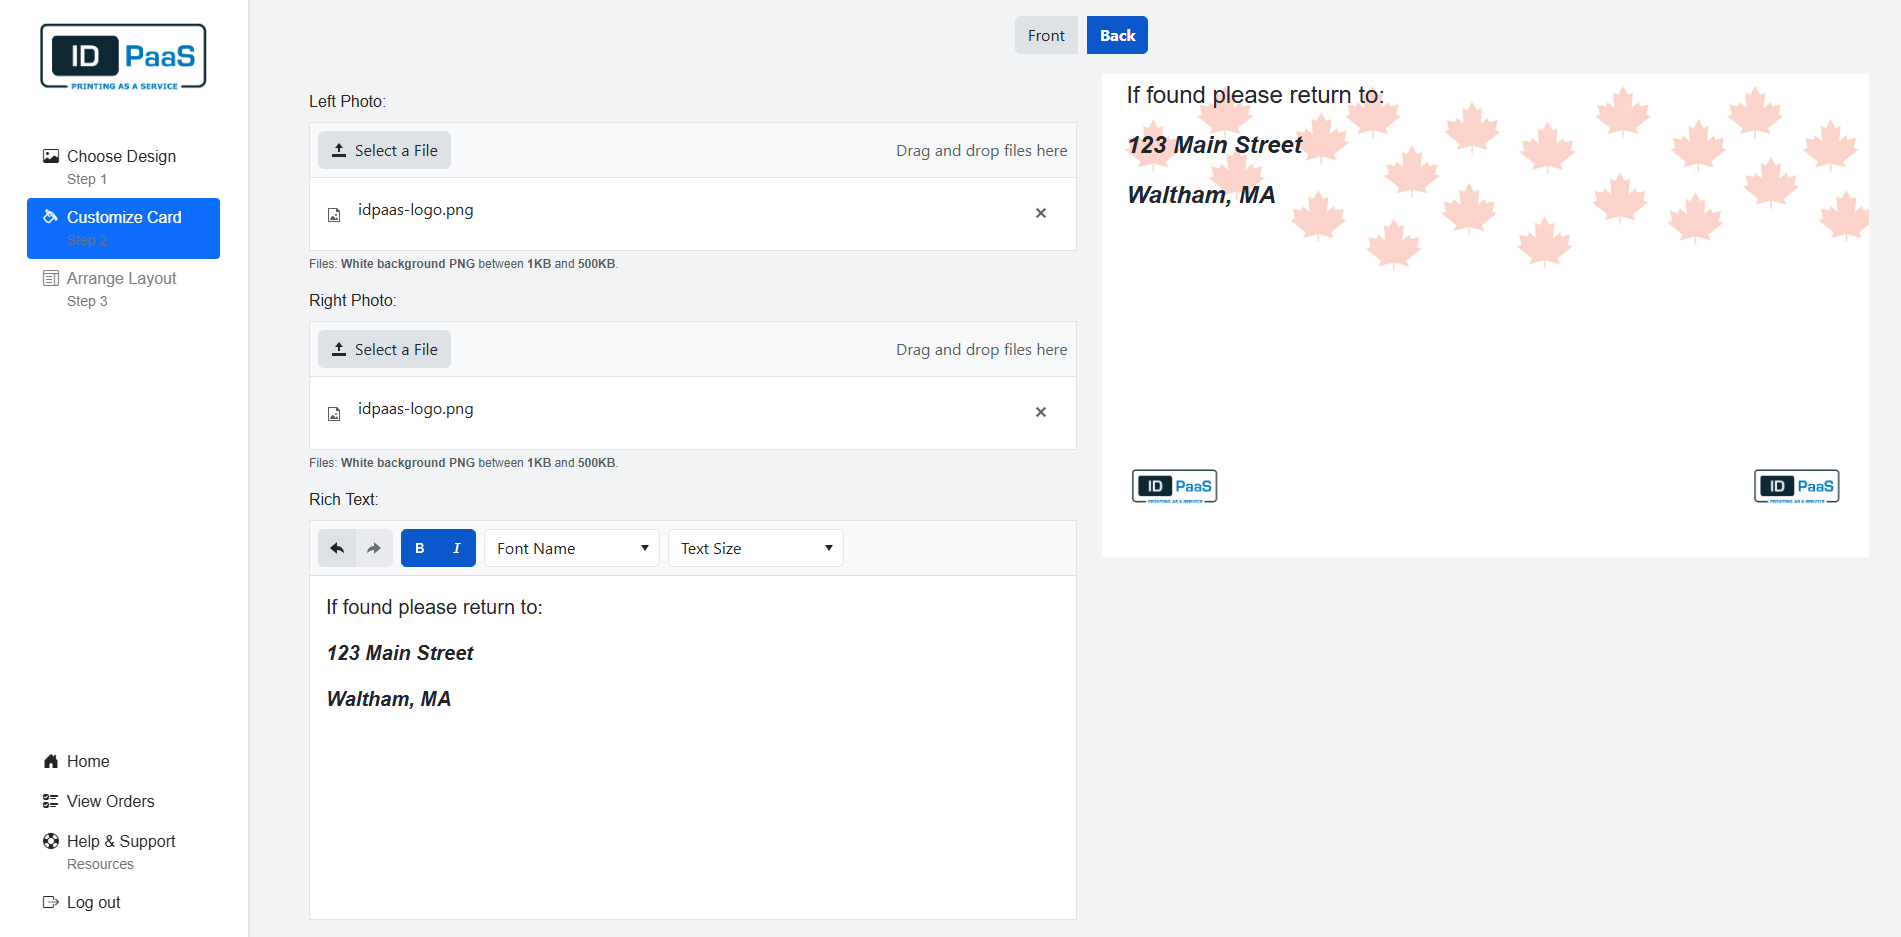
After you Finish customizing the card please click, "Continue to Step 3" button at the bottom of the page to continue to the Arrange Layouts page.
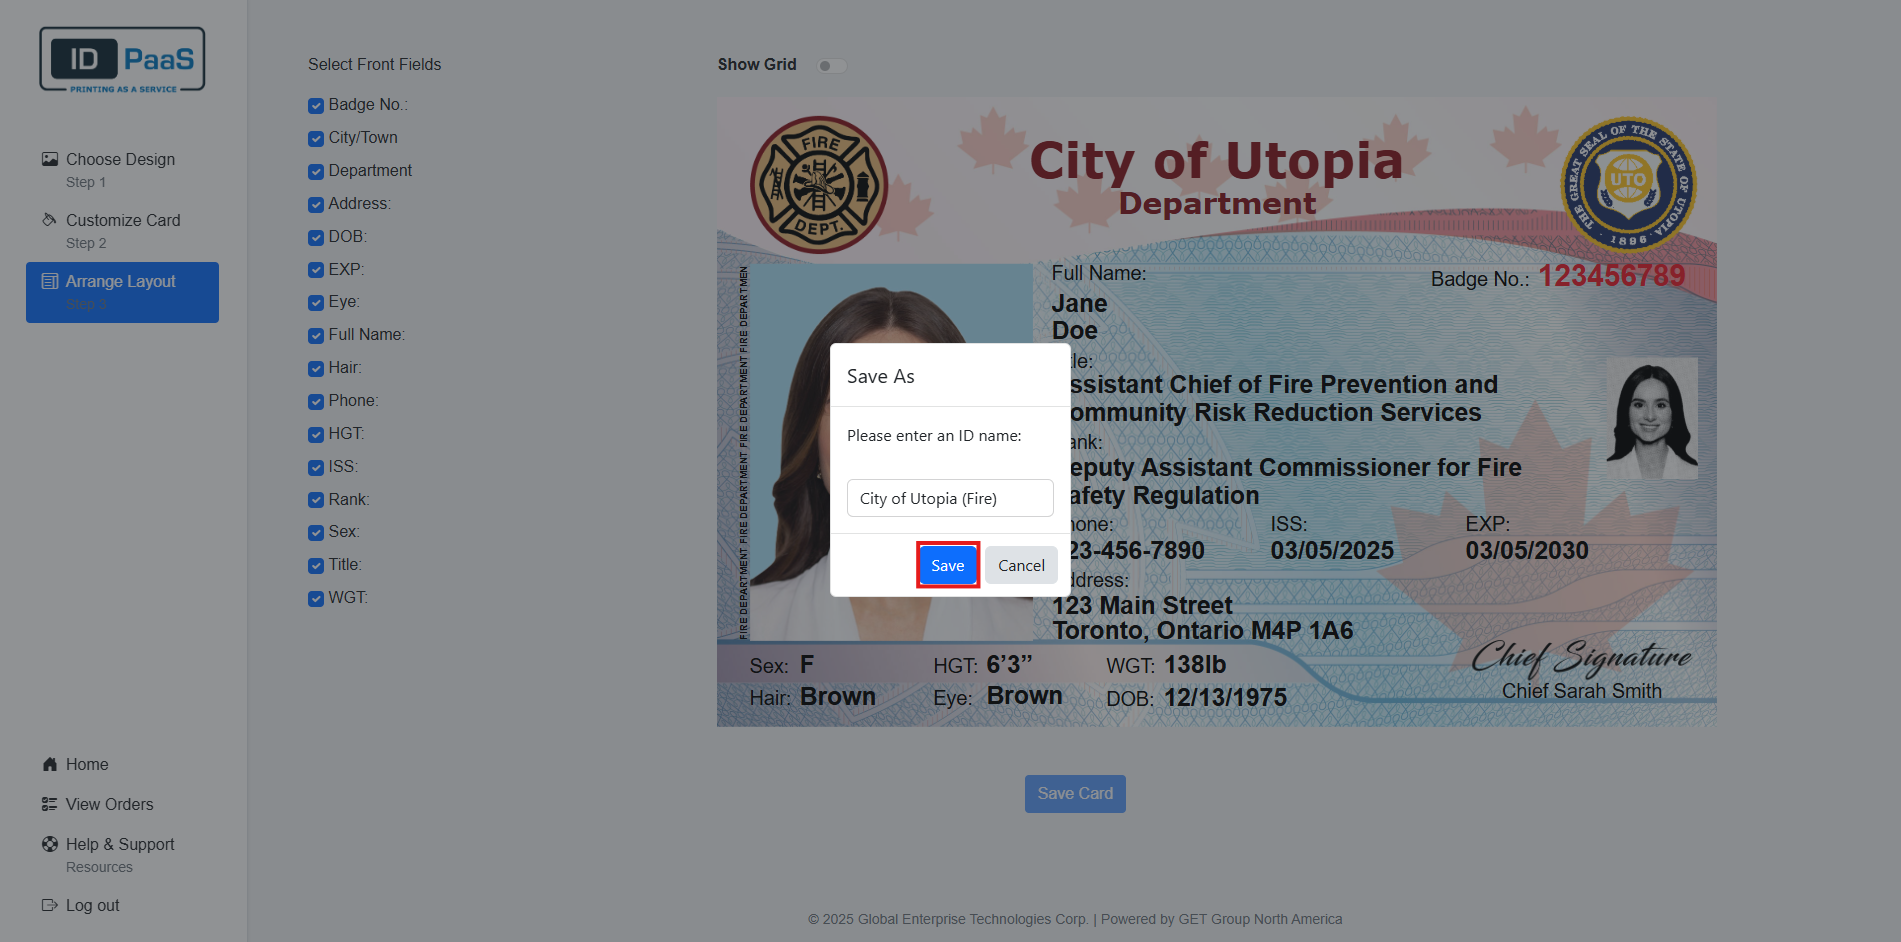
Arrange Layout
On the Arrange Layout page, you will be able to further modify certain fields and images on your ID.
Images: Double click on the images to be able to modify them
- Click on any of the 8 boxes that appear on the image to resize the image. The aspect Ratio will not change as you resize the image.
- Click on drag the image itself to move the location of the image.
Fields and Labels:
- Click and drag the field/label to move the field/label around the card.
- Right click on the label and select Rename to change the text of the label.
- Check off or off the field on the left under Select Front Fields to remove or add those Fields and Label from the card.
If you select Rename and leave it blank, it will remove just the label. Once you do this, the label will not be recoverable unless you either go back to the Customize Card page which will revert your changes from the Arrange Layouts page or return to the choose Design page and select a new Design which will force you to start from the beginning.
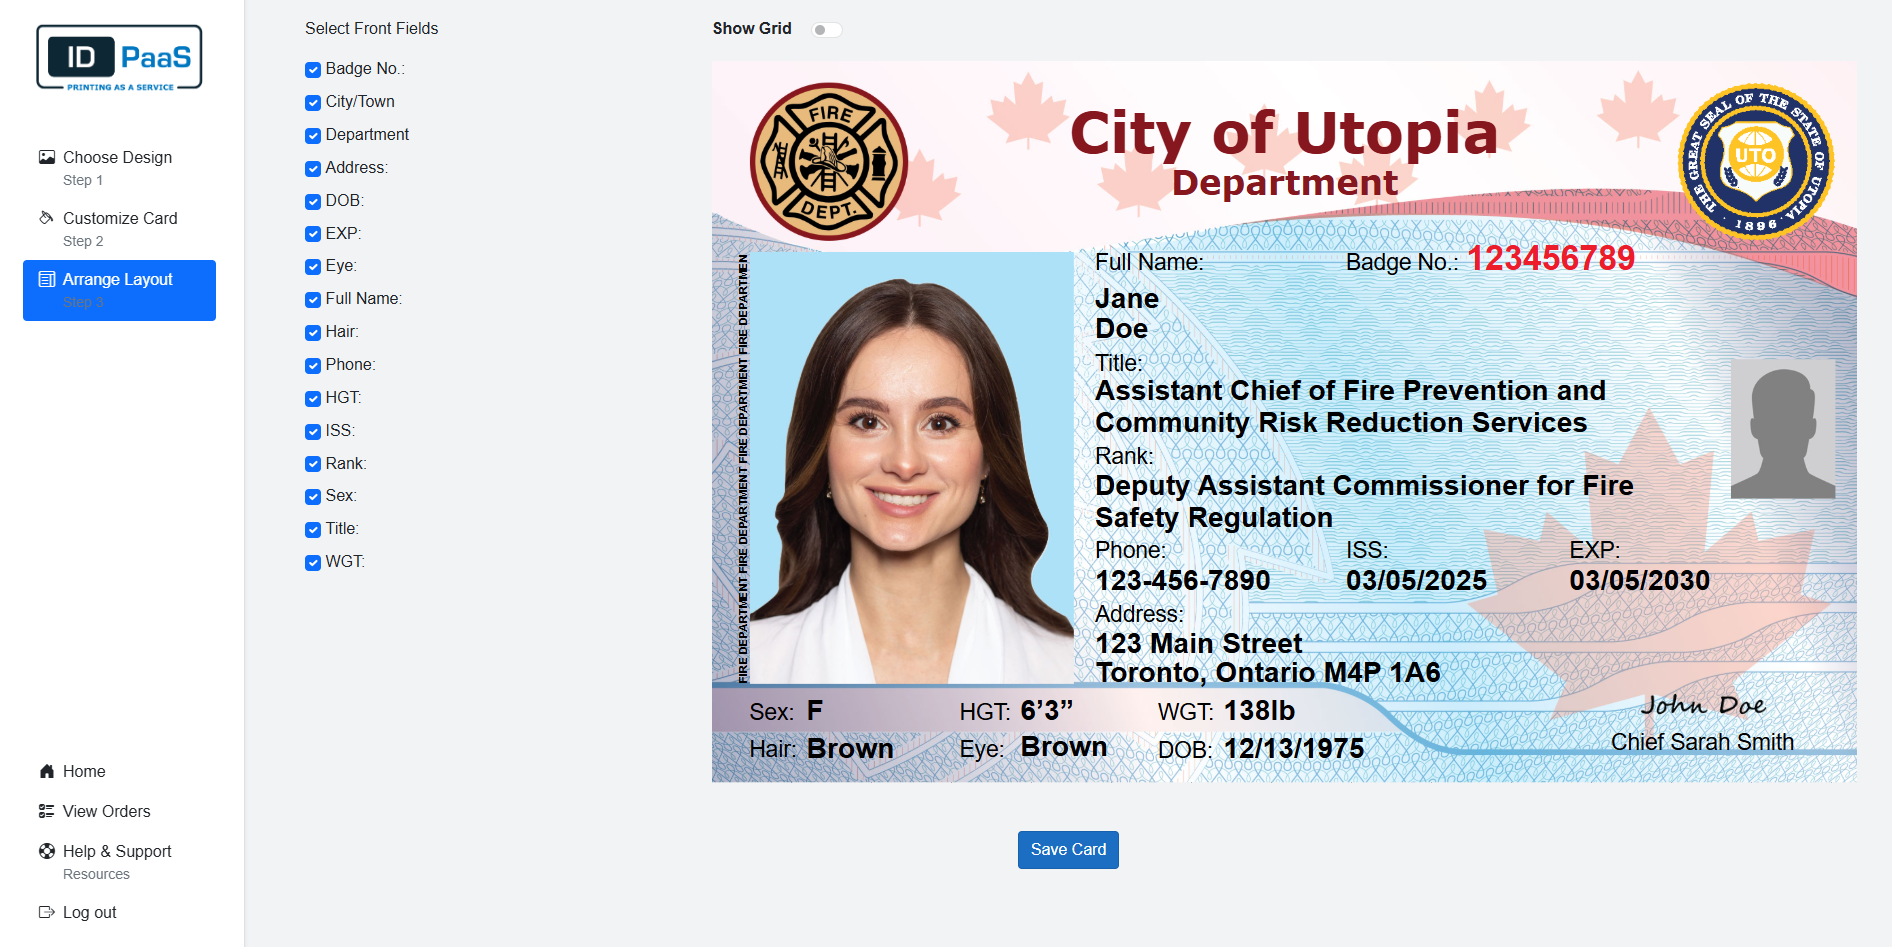
If you need some assistance aligning the fields, you can toggle the Show Grid button on to display a grid behind the ID.
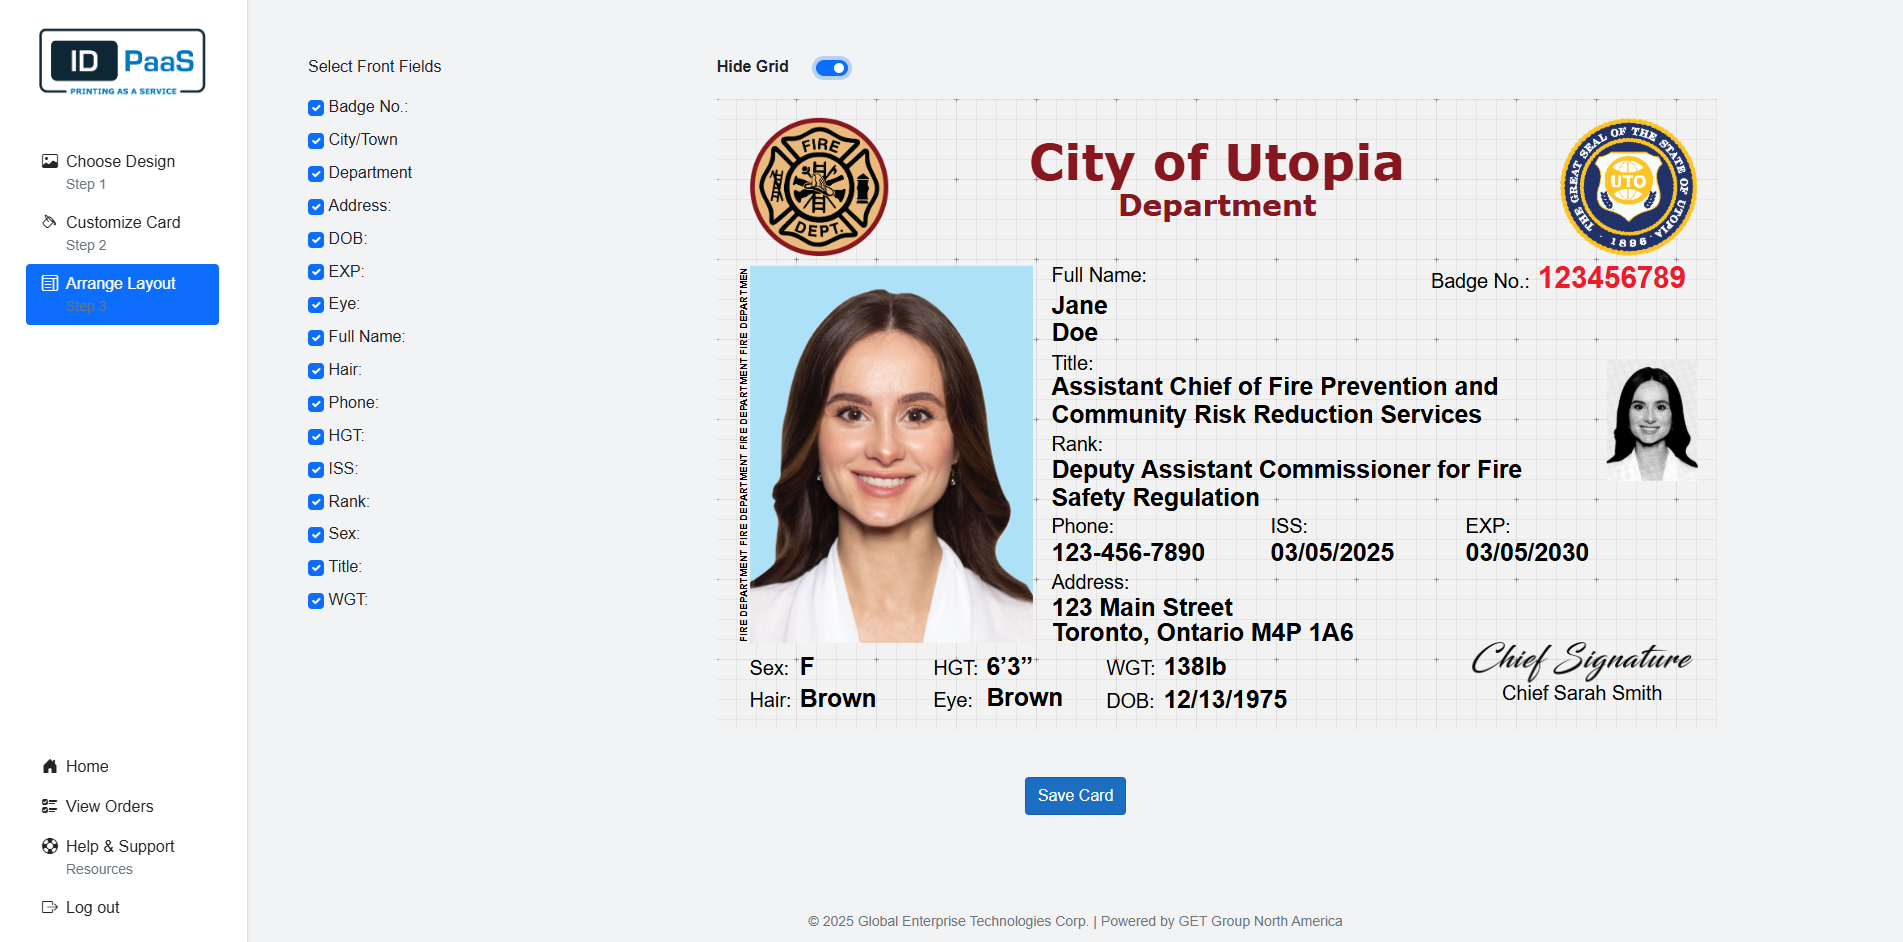
Once you have finished modifying your ID, please click the "Save Card" button. You will be prompted to enter a name for the template, please enter a name and select Save. The template will be saved, and you will be moved to the Enter Applicant Data page.